Snap Happy

16 phone photography tips to help you take great pictures for your brand
Ask a professional photographer to show you the tools of their trade, and they will gleefully present you with a tidal wave of equipment and accessories. Fancy cameras, assorted lenses, a menagerie of sure-footed tripods, travels bags, editing software, that little puffer thing they use to clean the lens… the list can go on.
And there’s no doubt that the images produced by these tools (when wielded by a talented photographer, of course) are of a high quality — perfect for use in your business’s marketing.
But what if you don’t have all the bells and whistles? Plenty of business owners like to take internal photos for their website, blog or social media profile, but what do you do if you don’t have a DSLR camera?
You use a phone.
Smartphone photography, mobile photography, iPhoneography — whatever you want to call it, no one can deny that using your camera phone is a perfectly viable option for taking photos for your business.
However, it isn’t as simple as pointing and shooting. Anyone can pick up a mobile and take a picture, but you’ll need to use a bit more finesse to capture great images that work well for content marketing.
Without further ado, let’s explore some of the simple tips and techniques that will help transform your photography from typical to top-end.
1. Know your phone
First things first: get to know the settings and capabilities of your phone’s camera. Take the time to test its various modes (panorama, HDR, video, and so on) in different conditions (early morning, late night, direct sun, low light, moving subjects, subjects of different sizes, etc.).
Testing your phone’s camera is the best way for you to build your knowledge and skills, allowing you to use the right modes and settings in different circumstances, and thus produce photographs of a higher quality.
Remember that Android phones and iPhones have different functions — and each model of these phones will offer a unique collection of settings and styles. If you’re in the market for a new phone, do your research to ensure your smartphone camera can deliver quality results. (iPhones are generally considered to be the superior choice for photography, but newer Androids are beginning to level out the playing field.)
There are also many free or paid apps that you can download to your phone, which can provide additional functionality and control for your camera. These aren’t necessary, but you might enjoy experimenting with your options.
2. Stay focussed
A fuzzy, out-of-focus image can instantly look amateurish. It is important to keep your subject in sharp focus, and it’s easy to do. Simply tap the screen where your subject is in the frame — this will ensure the subject is focussed and the lighting is optimised.
If your subject is moving around, make sure that you tap the screen just before you take the photo for a focussed result.
As a side note, many professional photographers recommend that you have only one, interesting subject in the frame. This will prevent the photo from becoming too cluttered, give you an exact point to focus on, and help the subject to stand out.
3. Don’t zoom in
When you take a photo from a distance or have a small subject, your natural instinct may be to zoom in. But a digital zoom will actually decrease the quality of your photograph, making it appear blurry, grainy or pixelated.
Instead, try to get closer to your subject when possible and keep away from the digital zoom. Alternatively, take the photo as normal, then crop the image in the editing process. This will allow you to optimise the image to suit your purposes without compromising the integrity of the photo.
Also take note that some newer camera phones have an ‘optical zoom’ function; unlike digital zoom, this won’t enlarge your subject by enlarging pixels, and thus is a more usable zoom function.
4. Light it up
Lighting can notably affect the look and feel of your photography. The better lit your subject is, the clearer your photo will be. Take advantage of natural light when you can; shoot outside or near other ambient sources of light.
Test your phone’s capabilities in different locations throughout the day. You’ll notice that lighting can change the mood and even the colour of your photos — the soft golden light of sunrise will instantly capture a different tone than the cool blues just after sunset.
Be careful when using the built-in flash on your smartphone camera. The flash can make subjects look overexposed or washed out, particularly when used inside in poor lighting. However, the flash can be useful when shooting outside, acting as a ‘fill flash’ to add clarity to the shot. (Again, practice is key!)
[bs_row class=”row”]
[bs_col class=”col-sm-6″] [/bs_col][bs_col class=”col-sm-6″]
 [/bs_col]
[/bs_row]
5. Frame the photo
The way you frame your subject can greatly alter the visual interest of your shot. There are tons of ways to do this, so here are a few things to keep in mind.
A cluttered background can distract from your subject and distort the intended meaning of your photograph. One simple way to avoid this is to make use of negative space (see Tip 7), as this will help your subject to stand out.
Try to give your subject some breathing room. Leaving a bit of space around the edges of your frame can improve your composition and provide a clearer picture. The rule of thirds may help with this. (See Tip 6 for more.)
Finally, check the corners of your frame before you snap the shot. A distracting element in the corner, such as a spot of colour or an intriguing shape, can detract focus from your subject. When necessary, recompose your photo to eliminate diversions.
6. Use the ‘rule of thirds’
The rule of thirds can be seen in many forms of visual media, from magazine advertisements to the latest cinematic blockbusters. It is simply a principle for photographic composition, which divides an image into thirds to create two lines running horizontally and vertically (as shown below).
The idea is to position the important element of your photo along these lines or at the intersections. This creates an image that is balanced and engaging; off-centre composition can often make for a more interesting or organic shot.
Professional photographers will mentally envision these grid lines, but your phone can make the job easier. Search your camera’s settings; there should be an option for ‘Grid’, ‘Grid lines’ or ‘Guidelines’. Simply switch this on to display the grid.
7. Embrace negative space
Using negative space can be an easy way to simplify your frame, add emphasis to your subject, and give your photo that professional edge.
Negative space simply refers to the empty space in an image. This could be the sky, a wall, an expanse of water or grass, or any other backdrop that is non-distracting. The idea is simply to keep the viewer’s eye drawn to the subject, allowing it to make a greater impact and evoke a more powerful response.
In fact, some photographers say that your subject should only fill about one-third of the frame, with the remaining two-thirds being negative space. Experiment with ways to make your subject pop!
[bs_row class=”row”]
[bs_col class=”col-sm-6″] [/bs_col][bs_col class=”col-sm-6″]
 [/bs_col]
[/bs_row]
8. Try a new angle
Give your photos a new perspective by taking them from unique angles. Novice photographers will often shoot from a standard straight-on position, but the beauty of phone photography is that your smartphone is light and small, allowing you to take it into unexpected places and perspectives.
Try taking your photos from an upward angle, a downward angle, or a bird’s eye view. Capture the illusion of depth or height by shooting from the ground or from up above. This can create an alternative perspective of your subjects, offering your audience a unique viewpoint that they mightn’t otherwise experience.
The goal is to take photos that are eye-catching and memorable, so try a new angle and see what effects you are able to capture.
[bs_row class=”row”]
[bs_col class=”col-sm-6″]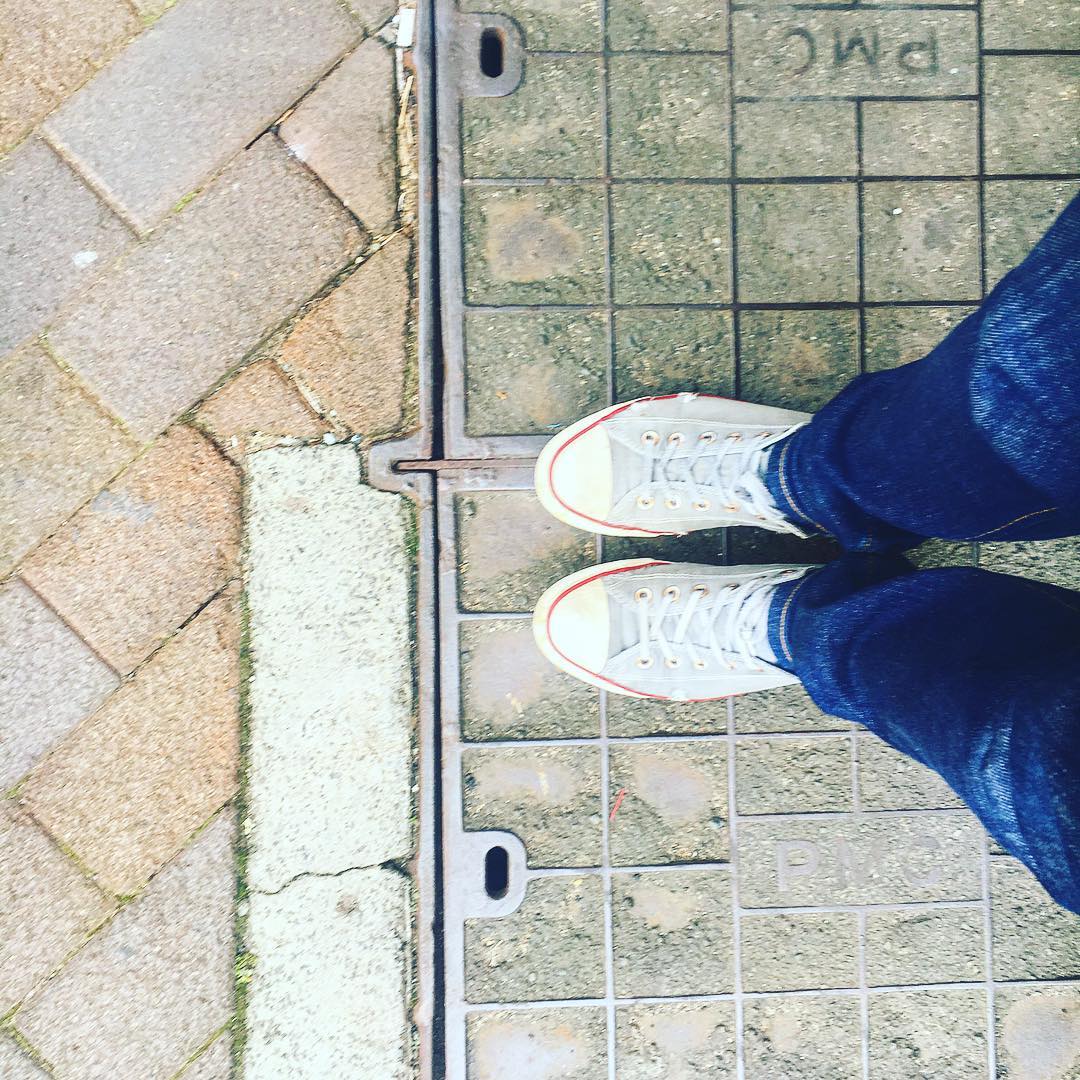 [/bs_col][bs_col class=”col-sm-6″]
 [/bs_col]
[/bs_row]
9. Appreciate the small things
We don’t always have the time to stop and appreciate the little things. Perhaps that’s what makes macro-photography so visually compelling for viewers. Close-up photographs of small subjects and intricate details can express a sense of finesse and attentiveness.
If necessary, you can make adjustments with the ‘sharpen’ tool in your phone’s (or app’s) editing software. Used sparingly, this can help to add a crispness to the details of your photo.
However, you should check that your phone’s camera is capable of capturing these close-up, macro subjects. Not all cameras will be able to adequately focus for effective macro-photography.
[bs_row class=”row”]
[bs_col class=”col-sm-6″] [/bs_col][bs_col class=”col-sm-6″]
 [/bs_col]
[/bs_row]
10. Look for patterns
Repetitive patterns can be eye-catching and visually compelling. Look for recurring lines, colours, shapes and other elements to make an impact with your images.
This type of photography can be striking, regardless of whether the effect has been set up for the shot, or found unintentionally in your everyday life.
Similarly, using symmetry in your photography can create a beautifully balanced and harmonious image. Look for elements that are naturally symmetrical, or specifically create proportion for your picture. You may find the rule of thirds (Tip 6) helpful for your composition.
[bs_row class=”row”]
[bs_col class=”col-sm-6″] [/bs_col][bs_col class=”col-sm-6″]
 [/bs_col]
[/bs_row]
11. Capture candids
There are many different ways for you to photograph human subjects. Posed photos are what typically fill people’s albums — family and friends smiling at the camera, actively engaging with the lens. But candid shots can be more interesting and relevant for content marketing.
A candid photograph is essentially the opposite of a posed photo. It’s a ‘natural’ image captured in the absence of posing, wherein the subject is moving, doing something, or perhaps caught unaware by the photographer.
Candid photos may be more suitable for capturing the emotion or essence of a scene. This can be particularly effective for providing a behind-the-scenes perspective of your business’s clients, customers and employees.
12. Reflections and shadows
Always be on the lookout for those special elements that could add an extra ‘oomph’ to your image. Reflections and shadows are two such elements to play with. They may even be subjects in their own right.
Use of reflections can be a great way to bring an eye-catching edge to your shots. Experiment with different causes of reflections — puddles, still water, sunglasses, drinking glasses, metallic surfaces, windows and (of course) mirrors can create great effects.
Shadows can similarly add intrigue to your photography. They could also be used to produce a frame or leading lines, which help to direct the audience’s attention to a particular part of the image.
13. Consider colour
Colour plays a huge role in the appearance and mood of your shot. A highly saturated shot will feel different than muted colours, and a coloured shot will feel different if converted to black-and-white.
Pay attention to the colours in your frame. Do they draw attention to your subject, or detract from it? Do they add interest, or cause chaos? If the colours aren’t working, you may need to recompose, or try taking the photo at a different time of day.
Colour can also be used to help direct the viewer’s eye. This could be due to a naturally or incidentally occurring pop of colour (a single red leaf on an otherwise green tree), or the result of selective colourisation (an editing effect in which the entire photo is greyscale, except for a single subject that remains coloured).
Lighting can also greatly impact on the colour of your shot (Tip 4). Think about the emotions you’re trying to evoke, and compose your picture accordingly.
[bs_row class=”row”]
[bs_col class=”col-sm-6″]

[/bs_col]
[bs_col class=”col-sm-6″]
 [/bs_col]
[/bs_row]
14. Evoke emotion
Let’s explore that idea further. When taking a photo, think not only about the way it will look, but also how it will make the viewer think and feel. The most memorable photos are ones that evoke an emotive response. This could be amusement, awe, sadness, loneliness — anything that makes you sit up and take notice.
Images are far more effective than text at eliciting emotion. Knowing the emotion that you want to evoke can help direct your composition of the photo. What will better convey joy — early morning lighting, or evening shadows? How will you express isolation — by surrounding a single subject with negative space or a busy crowd?
There are no right or wrong answers. Play around with different elements and try to think outside the box.
[bs_row class=”row”]
[bs_col class=”col-sm-6″]

[/bs_col]
[bs_col class=”col-sm-6″]
 [/bs_col]
[/bs_row]
15. Vary your subjects
A smartphone camera may have more technical limitations than a DSLR camera, but your choice in subject matter is virtually limitless.
It’s a good idea to bring a bit of diversity into your photography, particularly when it will be used for content marketing. Inspiration is everywhere. Here are a few starting points to get you started:
- Daily life — Look for photo ideas in your day-to-day life. For businesses, this could mean snapping shots of work meetings, new products, employees carrying out services, and so on. Give viewers an insider’s perspective to your everyday life.
- Special events — Share photos of more unusual activities. Perhaps a colleague went to a conference, or your business was involved in a community event. Taking photos with smartphones means you don’t have to lug heavy camera equipment around with you.
- People and pets — Viewers will often gravitate towards images of people (and pets!) because they provide a look into who you are, what you do, and who you interact with. If it relates to your business, try personalising your photos by including a living subject.
- Location shots — Your business is part of a community; express that ideal through your photography. Photos of the local area, of employees getting coffee at a well-known cafe, and other street shots can be highly popular with viewers.
Look for photo opportunities everywhere you turn. This will not only lend variety to your content marketing, but will also train your eye into recognising photo-worthy moments on a whim.
16. Some rules are made to be broken
So that’s fifteen pointers for your smartphone photography. But remember — these are tips, not strict rules. Sometimes the situation will call for a different approach, and sometimes a great photograph will be achieved by going against the grain.
If you’re new to phone photography and want to start building your knowledge, you may find these guidelines helpful. Learn the ‘rules’ before you learn how to break them. If you think you can create an amazing image by centring your subject, shooting with a flash, and filling the negative space, give it your best shot. Sometimes you’ll need to take 100 photos to get the perfect one — there’s no reason why you can’t.
Discover where your smartphone can take your photography!